

Friday, January 4, 2019
Wednesday, January 2, 2019

Monday, December 31, 2018
Beach Blanket Bokoblins
Here it is folks, my last entry. Maybe just for now, maybe forever. I really did love writing this blog, but it just became so time consuming and taxing, having to replay everything I've already done and take all the screenshots. I haven't even played this game in over a year, except to take screenshots for this blog! Still, this was a fun writing project, and I will use the skills I learned here as I pursue other projects. But, I'm not done writing about video games yet! I just need to broaden my focus. So, I hope you will enjoy reading my new blog, about video games and pop culture: The Woebegone Golem. New posts start January 7th!
I eventually give up on solving the mystery of the three trees. I will be back though! The hills I’ve been following don’t go on much further, so I glide back down to the main path once I near Dueling Peaks. When I reach the stable proper, I nab a few more things for my camera - animals, a few ingredients - before warping back to Hateno Village - specifically the Tech Lab. Before I head back to Kakariko, there’s a few more things to finish up around here.
I chose here and not further into town because the things that need taking care of are all outside of town, and we are going to start by taking care of those sheep rustling monsters. I head down the path from the lab until I reach the point it forks to the left, leading to the beach.
As the path winds down the mountainside, I can see Hateno Beach and Bar below me. I see what looks like an enemy encampment - looks like that is where the sheep rustlers are based - and far off in the center of the bay, the orange glow of a shrine. I pull out my scope just to be sure. Yep! There are a few other oddities in the bay. I see a strange rock formation with a large flock of birds hovering above, and even more outcroppings along the coastline that will require exploring.
The path turns to the left, running north for a short while until it reaches a small pond with a waterfalls, surrounded by trees. In the center of the pond is a lilypad ring, which also means a Korok. I backtrack a little, there’s a short cliff I can climb to reach above the waterfall so I can dive in. Well, hover over and drop in. Korok Seed please!
I find another new ingredient/critter scurrying across the beach - Crabs! I find two main varieties, there’s the red Ironshell Crab, which raises defense, and the blue Razorclaw Crab, which raises attack. Though living, I think they count as seafood similar to fish, and so should be cooked with food instead of potion ingredients.
As I near the camp, I can see that it’s a busy one. Really busy. I move from the beach into the grass, giving the blin’s a wide berth so that that they don’t see me as I approach. There’s a set of hills nearby I can hide behind that are close enough that I can make out the details of the camp’s inhabitants.
I count a total of EIGHT bokoblins or all colors, including a a couple of new and presumably more powerful Black Bokoblins, the real ones. There’s also a Blue Moblin in attendance, but he’s the only one. I can see two sheep being kept in some sort of pen, which I assume are Koyin’s. Surprised they’re smart enough to build something like that, frankly.
This isn’t going to be an easy fight. There’s a ton of enemies, some very high level, and little to no cover for me to take once I get in there. It’s late in the afternoon, night will fall soon, so I decide to wait and use that to my advantage. Most of them should fall asleep, hopefully giving me at least a little bit of an advantage.
A few in-game hours after he sun goes down, all but two of the blin’s are asleep. The two who are awake aren't even acting like lookouts, they're just dancing around a campfire. I know I won’t be able to sneak up and murder all of them in their sleep, so let’s just start with the biggest guy: the mobilin.
I sneak close to the sleeping Moblin, waiting for the Sneakstrike command to pop up. After I land the blow, I continue to attack him with my club, reducing him to black ash and moblin parts. Unfortunately, in the commotion I also woke up and alerted all the remaining bokoblins. Retreat!
I move back so that I’m not in the middle of the group, doing my best to attack them from a distance as they approach. They have their own archers though, and I take a few arrows in the side when I’m trying to focus on the nasty black fucker in front of me. This is not an easy or pretty fight. I’m surrounded by 3 bokoblins, one black and two blue, and there’s one or two more still in the fort trying to hit me with arrows. I try to focus on the weaker enemies and using weapons that can fling them away, get some distance between us. I nearly lose it and end up having to eat some of my prepared food when I get close to death, but I manage to take out the bokoblins accosting me on foot.
That just leaves two more bokoblins, one heading towards me on foot with a spear, and a much weaker red one firing arrows at me from the fort. Still dodging arrows, I take out the last blue bokoblin and run up the ramp and knock out the last one. As his body disintegrates into monster parts, the nearby chest is unlocked - holding inside a Ruby. I also get the notification that my quest log has been updated. The sheep are free to go!
Before I go back to town to complete the quest, I want to finish exploring down here. This is as far east as I seem to be able to go, and I can see on the map a few nearby areas that warrant some investigating. It starts raining as I finish exploring the strip of land I’m on, though I don’t find much else beyond more crabs until I head towards the southern end. There, what do I find but a yellow Korok flower! I touch it, and watch as it jumped from the shore to a nearby rock in the water. It continues to bounce around rocks along the shoreline until finally, the white flower appears on the largest rock, netting me another Korok Seed.
In front of that shallow pool, however, is a very obvious Korok puzzle: a ring of stones. This one, however, is missing not one but three. I have to do a little hunting - the stones aren’t in obvious places, and there are also exactly three of them. The three empty spots are all on different sides of the circle, so I use that as a hint, exploring in each direction of the hole. Doesn’t take too long before my new Korok buddy shows up and gives me another Korok Seed.
From the stone circle, I find a second Korok puzzle - another yellow flower to chase. This one starts on the right side of the point, atop a rocky hill. From there, it leads me up the east end of the rocky hills surrounding the pool, before finally giving up my 45th Korok Seed.
And from there, I spot yet another Korok puzzle - this time a pinwheel on top of a rocky outcropping just north of where I am. It stands at the center of the pool making up Mapla Point. It’s not a far climb from where the white flower and Korok lead me to. Once there and with ym bow out, three balloons appear and begin to rotate around me. Not nearly as annoying as the last one of these I did. Only takes me three shots and bam, 46th Korok Seed.
From my spot atop Mapla Point, I look out into the ocean to the east. I see islands in the distance, though I suspect that I would hit na invisible wall long before I made it there. Slightly more to the south appears to be an island I could actually swim too, however. Probably a few fun things to discover there in the future.
I look down into the pool of water, which is filled with any number of rocks and boulders. And what do you know, another Korok puzzle. This one is a simple lilypad circle in the water, so after angling myself, I leap from the outcropping and pull out my glider. Then I am myself to be sitting above the circle, and drop the glider. Fall, splash, Korok Seed!
Well, that was quite the Korok hunting expedition. I swim towards shallow water so I can exit the pool, ready to move south now. Then I wander too close to one of the giant boulders down here.
Oh goddamnit. Another fucking Talus.
Heart Containers: 5
Shrines Completed: 11
Koroks Found: 41
Sheep: No longer rustled
Deepback Bay: Not very deep
Mapla Point: A good place for Koroks and ROCK MONSTERS
I eventually give up on solving the mystery of the three trees. I will be back though! The hills I’ve been following don’t go on much further, so I glide back down to the main path once I near Dueling Peaks. When I reach the stable proper, I nab a few more things for my camera - animals, a few ingredients - before warping back to Hateno Village - specifically the Tech Lab. Before I head back to Kakariko, there’s a few more things to finish up around here.
Hateno Ancient Tech Lab
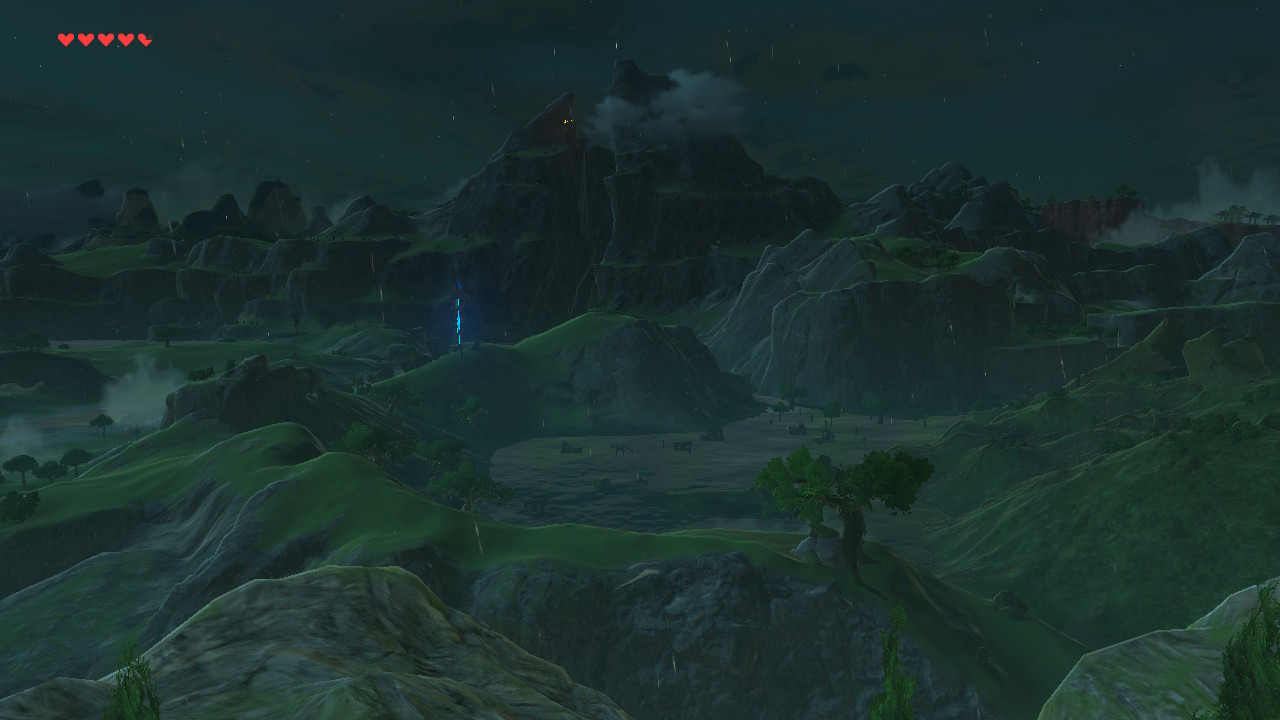
 |
| That's a lot of water. |
As the path winds down the mountainside, I can see Hateno Beach and Bar below me. I see what looks like an enemy encampment - looks like that is where the sheep rustlers are based - and far off in the center of the bay, the orange glow of a shrine. I pull out my scope just to be sure. Yep! There are a few other oddities in the bay. I see a strange rock formation with a large flock of birds hovering above, and even more outcroppings along the coastline that will require exploring.
The path turns to the left, running north for a short while until it reaches a small pond with a waterfalls, surrounded by trees. In the center of the pond is a lilypad ring, which also means a Korok. I backtrack a little, there’s a short cliff I can climb to reach above the waterfall so I can dive in. Well, hover over and drop in. Korok Seed please!
Hateno Beach
I continue following the winding path down the mountain until I am let out at the beach. Hateno Bay stretches wide before me, a bokoblin encampment to the left, the shrine and strange rock formation to the right. Along the coastline I see what appears to be a Lizafos? But it’s tan. The same color as the sand. Since they all seem to resemble chameleons in this game...it must be hiding? Or trying to hide. I ignore it for now, breaking to the left towards the camp.I find another new ingredient/critter scurrying across the beach - Crabs! I find two main varieties, there’s the red Ironshell Crab, which raises defense, and the blue Razorclaw Crab, which raises attack. Though living, I think they count as seafood similar to fish, and so should be cooked with food instead of potion ingredients.
 |
| That's a lot of 'blins |
As I near the camp, I can see that it’s a busy one. Really busy. I move from the beach into the grass, giving the blin’s a wide berth so that that they don’t see me as I approach. There’s a set of hills nearby I can hide behind that are close enough that I can make out the details of the camp’s inhabitants.
I count a total of EIGHT bokoblins or all colors, including a a couple of new and presumably more powerful Black Bokoblins, the real ones. There’s also a Blue Moblin in attendance, but he’s the only one. I can see two sheep being kept in some sort of pen, which I assume are Koyin’s. Surprised they’re smart enough to build something like that, frankly.
This isn’t going to be an easy fight. There’s a ton of enemies, some very high level, and little to no cover for me to take once I get in there. It’s late in the afternoon, night will fall soon, so I decide to wait and use that to my advantage. Most of them should fall asleep, hopefully giving me at least a little bit of an advantage.
A few in-game hours after he sun goes down, all but two of the blin’s are asleep. The two who are awake aren't even acting like lookouts, they're just dancing around a campfire. I know I won’t be able to sneak up and murder all of them in their sleep, so let’s just start with the biggest guy: the mobilin.
 |
| Headshot! |
I sneak close to the sleeping Moblin, waiting for the Sneakstrike command to pop up. After I land the blow, I continue to attack him with my club, reducing him to black ash and moblin parts. Unfortunately, in the commotion I also woke up and alerted all the remaining bokoblins. Retreat!
I move back so that I’m not in the middle of the group, doing my best to attack them from a distance as they approach. They have their own archers though, and I take a few arrows in the side when I’m trying to focus on the nasty black fucker in front of me. This is not an easy or pretty fight. I’m surrounded by 3 bokoblins, one black and two blue, and there’s one or two more still in the fort trying to hit me with arrows. I try to focus on the weaker enemies and using weapons that can fling them away, get some distance between us. I nearly lose it and end up having to eat some of my prepared food when I get close to death, but I manage to take out the bokoblins accosting me on foot.
 |
| Apologies to the palm trees destroyed as collateral damage. |
Before I go back to town to complete the quest, I want to finish exploring down here. This is as far east as I seem to be able to go, and I can see on the map a few nearby areas that warrant some investigating. It starts raining as I finish exploring the strip of land I’m on, though I don’t find much else beyond more crabs until I head towards the southern end. There, what do I find but a yellow Korok flower! I touch it, and watch as it jumped from the shore to a nearby rock in the water. It continues to bounce around rocks along the shoreline until finally, the white flower appears on the largest rock, netting me another Korok Seed.
Deepback Bay
Heading around the coastline, I see a boat docked on the beach. That’s convenient. As I head towards it, I am attacked not once, but twice by a trio of enemies. The first is a set of giant blue Chus, which I am happy are not any of the elemental variety. The second appears to be a trio of small Stone Taluses. Tali? I dunno, but they're called Pebblits and I use my sledgehammer to reduce them to rubble. When I'm finished, I continue to the raft and hop aboard and use my korok leaf to blow me across the bay. I wish I had a more exciting story to tell you, but I don’t. I exit Deepback Bay almost as fast as I entered it.Mapla Point
On this new coastline I find more crabs, and I stock up. They seem like they count as fish for food, rather than a potion ingredient, so I can see making a lot of useful recipes out of them. I round the corner to Mapla Point proper, seeing a large shallow pool of water nestled among the rocky hills. |
| I should have gotten three different seeds for this one. |
From the stone circle, I find a second Korok puzzle - another yellow flower to chase. This one starts on the right side of the point, atop a rocky hill. From there, it leads me up the east end of the rocky hills surrounding the pool, before finally giving up my 45th Korok Seed.
And from there, I spot yet another Korok puzzle - this time a pinwheel on top of a rocky outcropping just north of where I am. It stands at the center of the pool making up Mapla Point. It’s not a far climb from where the white flower and Korok lead me to. Once there and with ym bow out, three balloons appear and begin to rotate around me. Not nearly as annoying as the last one of these I did. Only takes me three shots and bam, 46th Korok Seed.
From my spot atop Mapla Point, I look out into the ocean to the east. I see islands in the distance, though I suspect that I would hit na invisible wall long before I made it there. Slightly more to the south appears to be an island I could actually swim too, however. Probably a few fun things to discover there in the future.
 |
| Maybe she's mad that I killed her babies earlier? |
Well, that was quite the Korok hunting expedition. I swim towards shallow water so I can exit the pool, ready to move south now. Then I wander too close to one of the giant boulders down here.
Oh goddamnit. Another fucking Talus.
Heart Containers: 5
Shrines Completed: 11
Koroks Found: 41
Sheep: No longer rustled
Deepback Bay: Not very deep
Mapla Point: A good place for Koroks and ROCK MONSTERS
Friday, December 28, 2018

Wednesday, December 26, 2018

Monday, December 24, 2018
In Which I Am a Backtracking Shutterbug
I walk into the lab after warping in, moving to Symin in the back. I hand over the three sunshrooms as requested, and in return he gives me 3 Hearty Truffles. He asks if I liked using the Sheikah Sensor+, and then also let’s me know he has something else he wants to talk to me about, when I have a chance.
No time like the present, my dude! He says he’s found another way to help my search for stuff with the Sensor. He again goes over how I can use pictures to blahblahblah. Then he asks me to put my Slate back on the Guidance Stone. Even Purah is in the dark about what he’s about to do, but wants to see it anyway so she allows it. (Snap!)
Rather than a rune or an upgrade, a picture is added to my Hyrule Compendium - this one is for Mighty Bananas, something I haven’t found in the wild yet (heh). Apparently, Symin discovered that it’s possible to recover pictures that were in the compendium in the past. Which they will be happy to do for me...for a nominal fee. I mean, that’s cool but I think I’ll enjoy taking these pictures myself. In fact… It probably wouldn’t hurt to fill in what I can right now, right? Then It’ll be easier to keep updated as I go along.
Time for a quick trip back to the Great Plateau! It won’t take too long, just enough to grab shots of the enemies and items that I can, then I’ll make the walk down to Dueling Peaks Stable, and then I’ll warp back here. Anything on the Kakariko-Hateno path I can grab on my way back to Impa. Actually that reminds me, I have another side quest I can complete now, I should be able to find a Traveler’s Sword somewhere on the plateau.
I work quickly though, cataloging things as I search. I learnt hat while you can add enemies, you cannot add the parts they drop. The same is true for animals. But the Compendium lists what each creature can drop, so you essentially are still able to hunt down anything you need, you just have to find the thing to kill for it first.
I also learn, entirely by accident, that you can take selfies! You can even have Link make a number of different poses using the left thumb stick. And even more when you hit the ZL button, for a total of nine. I screw around a little with it, taking pictures of my equipment for the Compendium while having Link make any number of ridiculous poses.
Once I’m finished there, I make my way down the path through the East Post and Outpost Ruins. I take pictures of the Moblins and a few other ingredients and items I couldn’t find on the plateau. Bugs and other critters prove particularly difficult, since the camera requires you to be fairly close for the picture to register, even with the zoom.
In an attempt to capture some of these creatures on camera, I wandered a bit far from the path, ending up southeast of Outpost Ruins on a small hill. A hill with a boulder on it that I don’t think twice about… until it starts moving, revealing itself to be a Talus. That makes three. This one looks different from the last two though - instead of a normal Ore Deposit weak point, this one appears to have a Luminous Stone Deposit sticking out of it’s back. It also has the subtitle (Luminous) after it’s name, if that wasn’t clear. Didn’t realize these could have subtypes!
Before the fight gets going, I snap a picture of it for my compendium - it registers different to the one on the plateau that I snapped a picture of not too long ago. Similar to the different colored bokoblins and moblins, they are considered different creatures. Incidentally, I also learned that the bokoblins I’ve been referring to as black are in fact blue.
This fight seems more difficult to my tumbles with the last two taluses. I don’t know if it has higher defense or HP, but it’s health bar seems to be going down much slower than them. His weak point is also placed in something of an odd location, directly on the center of it’s back, and I end up relying on my bombs more than I do arrows to know it over. But, when it’s knocked to the ground I can nail him head on with a sledgehammer pretty easily.
It’s a more difficult fight then I care to admit to - he actually even killed me once, forcing me to start the battle over upon reloading - but I eventually manage to take him down in a nice explosion of Luminous Stones, Flint, and even a Diamond! I mark my map with a skull to mark the location of the Talus for future reference.
With THAT adventure down, I should get moving again...right after I explore that building I now see just a little further southeast of here, on a place called Scout’s Hill.
There’s not much, just a solitary building/ruin, but it seems like it was important enough to label in fairly large letters on the map… oh well. It’s nice up here, peaceful. I would be very, very curious to see a version of this Hyrule with all the buildings still in tact. It would be a very different game. I also find a lone rock in the middle of the ruin. Korok!
There’s nothing else here for me to do, I suppose. I could hang out with my Korok buddy? Nah. I pull out my scope and scan the horizon for anything interesting. There’s plenty to the south and west, but for now I’m sticking to portions of the map that are uncovered - I’ve got enough to do as it is.
I see a few things across the river that could be interesting, but nothing that wouldn’t require some off-the-path climbing. So instead, I glide towards Proxim bridge, following down the Hylia River, name so because it seems to empty into Lake Hylia to the south. I can’t quite make the distance to the bridge and land on a beach just south of it - and right next to another Korok puzzle. It’s a Magnesis puzzle, so I switch runes and make the two sets of blocks match and get my Korok Seed.
I climb up the beach hills, intending to walk my way back around to the path. Purely out of habit, looking for bugs or critters hiding under rocks, I grab one just up the first hill. And it reveals another Korok. This brings my Korok Seed total to 40!
After that little surprise, I notice a small Bokoblin camp on another beach just below me ahead. Been a little while since I’ve seen one of these I haven’t already slaughtered! They’re all red boys, so it’s not a difficult or long fight - and bokoblins still can’t swim, so with a few well placed swings, they are all quickly down for the count. I open a nearby chest to obtain an Opal, which I am happy to replenish my gemstone stores with.
Standing on this small peninsula the bokoblins made camp on, I can see...something under Proxim Bridge. And even looking at the map, I looks like there’s a sandbar, or at least shallow enough water for me to stand under one of the awnings. Should be able to swim there from here…
It’s another Korok. Damn dudes, that’s like, four of them in a row. Now if I could just locate Hestu to spend them…
...Jesus Christ is that another Korok? I see an orange pinwheel on one of the hills rocky peaks. As I approach and pull out my bow, three balloon targets burst into existence, and immediately begin to move about in a confusing pattern. Never easy with these guys. I waste about half a dozen arrows, lost to the swamp below, but I nail all three balloons and get my 5th Korok Seed in a row, bringing me to a total of 41.
I continue along the hilltops further, passing by the Korok I found over here earlier, happily chilling in his spot on the giant logs. A few more hilltops over and I find another oddity. Three trees, all lined up perfectly. Two of the trees hold only a single apple, while the third holds many. Even the two trees that have the single apple have them in the exact same location. Hmm. This has to be a puzzle, right?
But what? First, I try picking all the apples. Nope. Maybe the apples make some kind of arrow that I just can’t see from this angle? I try firing off arrows in the direction it would be pointing, nothing. Oh! Maybe I have to throw a boomerang around all three trees? Nope, nothing, and I almost lost my boomerang too. Finally, I try cutting the trees down, starting with the one that held the most apples. And still nothing happens.
Sigh.
I hate Koroks.
Heart Containers: 5
Shrines Completed: 11
Koroks Found: 41
Symin: Sunshroomed
Traveler’s Swords: Lost to the ether
Korok Puzzles: Frustrating as all hell
 |
| Wait, is she making rocker hands? |
Rather than a rune or an upgrade, a picture is added to my Hyrule Compendium - this one is for Mighty Bananas, something I haven’t found in the wild yet (heh). Apparently, Symin discovered that it’s possible to recover pictures that were in the compendium in the past. Which they will be happy to do for me...for a nominal fee. I mean, that’s cool but I think I’ll enjoy taking these pictures myself. In fact… It probably wouldn’t hurt to fill in what I can right now, right? Then It’ll be easier to keep updated as I go along.
Time for a quick trip back to the Great Plateau! It won’t take too long, just enough to grab shots of the enemies and items that I can, then I’ll make the walk down to Dueling Peaks Stable, and then I’ll warp back here. Anything on the Kakariko-Hateno path I can grab on my way back to Impa. Actually that reminds me, I have another side quest I can complete now, I should be able to find a Traveler’s Sword somewhere on the plateau.
 |
| Back back back again... |
The Great Plateau
I don’t find a single Traveler’s Sword on the plateau. Not a single one. Did the ones i found earlier all come from chests? I scour the plateau, hitting all of the Bokoblin camps I can remember, but none of them are carrying one. Sigh.I work quickly though, cataloging things as I search. I learnt hat while you can add enemies, you cannot add the parts they drop. The same is true for animals. But the Compendium lists what each creature can drop, so you essentially are still able to hunt down anything you need, you just have to find the thing to kill for it first.
I also learn, entirely by accident, that you can take selfies! You can even have Link make a number of different poses using the left thumb stick. And even more when you hit the ZL button, for a total of nine. I screw around a little with it, taking pictures of my equipment for the Compendium while having Link make any number of ridiculous poses.
Once I’m finished there, I make my way down the path through the East Post and Outpost Ruins. I take pictures of the Moblins and a few other ingredients and items I couldn’t find on the plateau. Bugs and other critters prove particularly difficult, since the camera requires you to be fairly close for the picture to register, even with the zoom.
In an attempt to capture some of these creatures on camera, I wandered a bit far from the path, ending up southeast of Outpost Ruins on a small hill. A hill with a boulder on it that I don’t think twice about… until it starts moving, revealing itself to be a Talus. That makes three. This one looks different from the last two though - instead of a normal Ore Deposit weak point, this one appears to have a Luminous Stone Deposit sticking out of it’s back. It also has the subtitle (Luminous) after it’s name, if that wasn’t clear. Didn’t realize these could have subtypes!
 |
| Oww. |
Before the fight gets going, I snap a picture of it for my compendium - it registers different to the one on the plateau that I snapped a picture of not too long ago. Similar to the different colored bokoblins and moblins, they are considered different creatures. Incidentally, I also learned that the bokoblins I’ve been referring to as black are in fact blue.
This fight seems more difficult to my tumbles with the last two taluses. I don’t know if it has higher defense or HP, but it’s health bar seems to be going down much slower than them. His weak point is also placed in something of an odd location, directly on the center of it’s back, and I end up relying on my bombs more than I do arrows to know it over. But, when it’s knocked to the ground I can nail him head on with a sledgehammer pretty easily.
It’s a more difficult fight then I care to admit to - he actually even killed me once, forcing me to start the battle over upon reloading - but I eventually manage to take him down in a nice explosion of Luminous Stones, Flint, and even a Diamond! I mark my map with a skull to mark the location of the Talus for future reference.
With THAT adventure down, I should get moving again...right after I explore that building I now see just a little further southeast of here, on a place called Scout’s Hill.
Scout’s Hill
 |
| This game really needs a photo mode. So creepy/beautiful. |
There’s nothing else here for me to do, I suppose. I could hang out with my Korok buddy? Nah. I pull out my scope and scan the horizon for anything interesting. There’s plenty to the south and west, but for now I’m sticking to portions of the map that are uncovered - I’ve got enough to do as it is.
I see a few things across the river that could be interesting, but nothing that wouldn’t require some off-the-path climbing. So instead, I glide towards Proxim bridge, following down the Hylia River, name so because it seems to empty into Lake Hylia to the south. I can’t quite make the distance to the bridge and land on a beach just south of it - and right next to another Korok puzzle. It’s a Magnesis puzzle, so I switch runes and make the two sets of blocks match and get my Korok Seed.
 |
| ...I could crush you so easily... |
After that little surprise, I notice a small Bokoblin camp on another beach just below me ahead. Been a little while since I’ve seen one of these I haven’t already slaughtered! They’re all red boys, so it’s not a difficult or long fight - and bokoblins still can’t swim, so with a few well placed swings, they are all quickly down for the count. I open a nearby chest to obtain an Opal, which I am happy to replenish my gemstone stores with.
 |
| This was intensely satisfying. |
It’s another Korok. Damn dudes, that’s like, four of them in a row. Now if I could just locate Hestu to spend them…
Hills of Baumer
Rather then continue on the path I’ve already traveled, I decide to follow along the hilltops to the south. I had already been up here once, avoiding the boulder traps as I navigated up the large fallen logs. This time I just climb up the old fashioned way. I can see a huge swamp to the south, just littered with burnt out buildings. It’s very tempting to explore down there...but I hold off....Jesus Christ is that another Korok? I see an orange pinwheel on one of the hills rocky peaks. As I approach and pull out my bow, three balloon targets burst into existence, and immediately begin to move about in a confusing pattern. Never easy with these guys. I waste about half a dozen arrows, lost to the swamp below, but I nail all three balloons and get my 5th Korok Seed in a row, bringing me to a total of 41.
 |
| WHAT THE FUCK AM I SUPPOSED TO DO WITH YOU!? |
But what? First, I try picking all the apples. Nope. Maybe the apples make some kind of arrow that I just can’t see from this angle? I try firing off arrows in the direction it would be pointing, nothing. Oh! Maybe I have to throw a boomerang around all three trees? Nope, nothing, and I almost lost my boomerang too. Finally, I try cutting the trees down, starting with the one that held the most apples. And still nothing happens.
Sigh.
I hate Koroks.
Heart Containers: 5
Shrines Completed: 11
Koroks Found: 41
Symin: Sunshroomed
Traveler’s Swords: Lost to the ether
Korok Puzzles: Frustrating as all hell
Friday, December 21, 2018

Subscribe to:
Comments (Atom)